
React에서 CRUD를 구현할 때, Update가 아마 가장 어려운 구현과정이 될 것 입니다.
그 이유는, props는 직접적으로 변경하는 것이 불가능하기 때문에 state를 통해서 변경해야하는 부분
기존 html과 react 문법의 차이로 인해서 update 부분이 어려운 부분이 있습니다.
UpdateContent 컴포넌트 생성
UpdateContent.js
import React from 'react';

class UpdateContent extends React.Component {
  constructor(props) {
    super(props);
    this.state = {
      id: this.props.id,
      title: this.props.title,
      desc: this.props.desc
    }

    this.inputFormHandler = this.inputFormHandler.bind(this);
  }

  inputFormHandler(e) {
    this.setState({[e.target.name]: e.target.value})
  }

  render() {
    return (
      <article>
        <h1>Update</h1>
        <form onSubmit={function(e) {
            e.preventDefault();
            this.props.updateContent(
                this.state.id,
                this.state.title,
                this.state.desc
            );
        }.bind(this)}>
            <input type="hidden" name="id" value={this.state.id} />
            <p>
              <input
                type="text"
                name="title"
                placeholder="title"
                value={this.state.title}
                onChange={this.inputFormHandler}
              />
            </p>
            <p>
              <textarea
                onChange={this.inputFormHandler}
                name="desc"
                placeholder="description"
                value={this.state.desc}
              ></textarea>
            </p>
            <input type="submit" value="제출" />
        </form>
      </article>
    );
  }
}


export default UpdateContent;여기서 자세하게 봐야할 점은, 다른 컴포넌트와 다르게 state를 선언한다는 점입니다.
UpdateContent 컴포넌트에서는 받아온 props 값을 변경해야하는데 props는 변경이 불가능하기 때문에 state에 한번 등록한 뒤에 수정하는 과정이 필요하기 때문입니다.
<textarea
    onChange={this.inputFormHandler}
    name="desc"
    placeholder="description"
    value={this.state.desc}
></textarea>그리고 textarea 부분을 보면, 원래 html에서는 <textarea></textarea>의 태그 사이에 value 값이 들어가지만 , react에서는 따로 태그 안에 속성으로써 value를 넣어줘야만 합니다.
inputFormHandler(e) {
	this.setState({[e.target.name]: e.target.value})
}inputFormHandler 함수는, input 창에 텍스트를 입력할 때마다 state값을 재설정 해주기 위한 함수입니다.
[e.target.name]은 type을 가르킵니다. 즉 'text'와 'textarea'값이 대입이 됩니다.
e.target.value는 말그대로 태그의 value값을 가져옵니다.
onChange={this.inputFormHandler} : value에 변경이 있을 때마다, inputFormHandler 함수가 실행되므로 , 입력을 할 때마다, setState로 state값이 변경되어 적용이 됩니다.
<form onSubmit={function(e) {
    e.preventDefault();
    this.props.updateContent(
        this.state.id,
        this.state.title,
        this.state.desc
    );
}.bind(this)}>form 태그에는 onSubmit 함수, 즉 submit버튼이 눌러지면, App컴포넌트에서 보낸 updadteContent 함수를 실행시킵니다. 인수로써는 id, title, desc 값을 전달합니다.
updateContent 함수 선언
App.js
updateContent(_id, _title, _desc) {
    let _content = Array.from(this.state.contents);
    for (let i = 0; i < _content.length; i++) {
      if (_content[i].id === _id) {
        _content[i] = {id: _id, title: _title, desc: _desc}
      }
    }
    this.setState({
      contents: _content,
      mode: 'read',
      selected_content_id: _id
    })
}UpdateContent 의 onSubmit에서 전달했던 id와 title, desc 값을 인수로 받아서 수정하는 함수입니다.
여기서도 Array.from()을 사용한 것에 주목해야합니다. 원본 array에 영향을 주지 않기 위함입니다. 이유는 저번 create 구현에서 설명했습니다.
그리고, update한 뒤에는 update한 컨텐츠를 바로 보여주기 위해서 mode 값은 read로 변경해줍니다.
if (_mode === 'read') {
  _article = <ReadContent title={_title} desc={_desc}/>
} else if (_mode === 'create') {
  _article = <CreateContent saveContent={this.saveContent} />
} else if (_mode === 'update') {
  _article = <UpdateContent
    updateContent={this.updateContent}
    id={this.state.selected_content_id}
    title={_title}
    desc={_desc}
   />
}mode가 update일 경우도 추가해줍니다.
update인 경우에는 기존의 데이터를 넘겨줘야하기 때문에, selected_content_id의 데이터를 가져와서 props로 넘겨줍니다.
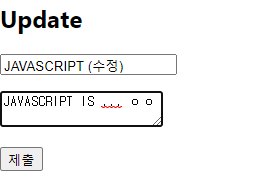
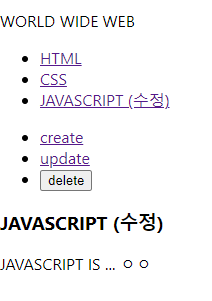
title과 desc 값을 수정해서 제출을 하면
리스트에도 변경이 적용이되고, 변경한 content의 내용이 본문으로 보여지게 됩니다.